Wallet As A Service Usage Guide
UTXOS Multichain Wallet as a Service provides a hosted wallet solution that eliminates the need for users to install browser extensions or manage private keys. It’s perfect for onboarding new users to your app with minimal friction.
Prerequisites
Before you begin, you need to set up a project:
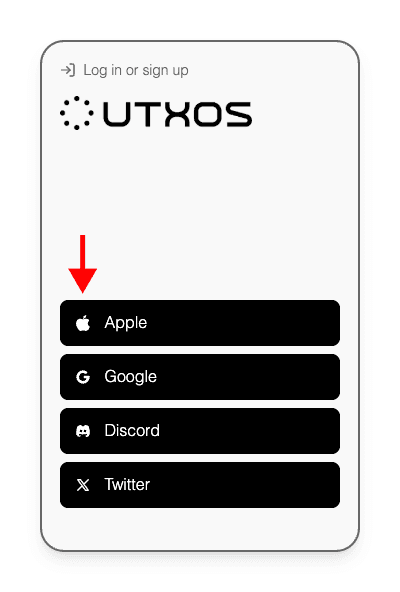
1. Create A Free Account
- Create an account by logging in with one of the supported providers:
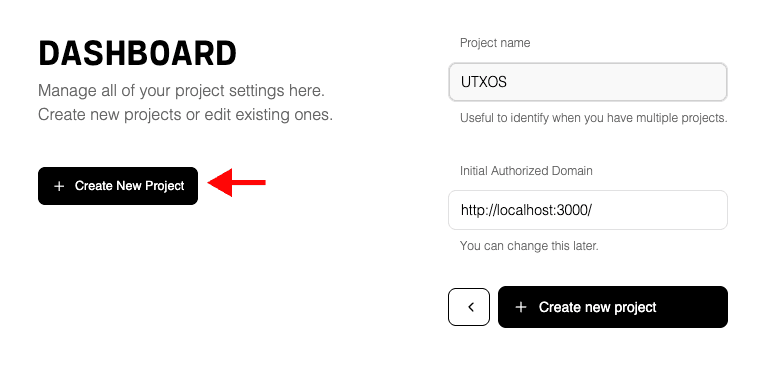
2. Create A Project
From the dashboard:
- Click “Create New Project”
- Enter your project name and
http://localhost:3000for now
3. Get Your UTXOS Credentials
- Copy your Project ID from project settings - Used to identify your project
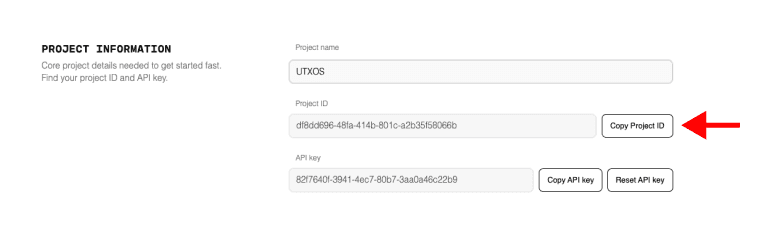
- Save this value into your codebase
.envfile
# .env
NEXT_PUBLIC_UTXOS_PROJECT_ID=your_project_id # safe to expose on client